Inserts a check box option into the current form.
-
Click on the Checkbox button
 on the Forms Toolbar.
Or, access the Insert menu and select Checkbox Button from the Forms sub menu.
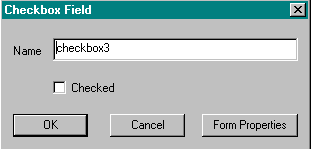
The Checkbox Field box is displayed.
- The Checkbox Field Box has the following options:
- Name:
Specify a unique name for this check box field. This name is used in the CGI program to refer to this element. Web Factory provides a unique name that you or the CGI programmer can change. - Checked:
Select this option if you want the checkbox to be selected.
- Name:
- Click OK.
The checkbox button is displayed in the form.
| Example: | Favories desserts: You can select more than one item. |
Displays the Radio Box Field box, which allows you to insert a radio button option into the current form.
-
Click on the Radio button
 on the Forms Toolbar.
Or, access the Insert menu and select Radio Button from the Forms sub menu.
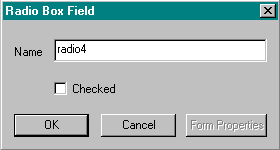
The Radio Box Field box is displayed.
- The Radio Box Field box has the following options:
- Name:
Specify a unique name for this radio button field. This name is used in the CGI program to refer to this element. Web Factory provides a unique name that you or the CGI programmer can change. - Checked:
Select this option if you want this radio button to be selected. Keep in mind that within a set of radio buttons, only one is selected.
- Name:
- Click OK.
The radio button is displayed in the form.
| Example: | Favories desserts: You can select only one item. |
Inserts a submit button into the current form. Submit buttons send the information gathered from the user to the CGI program for processing.
-
Click on the Submit button
 on the Forms Toolbar.
Or, access the Insert menu and select Submit Button from the Forms sub menu.
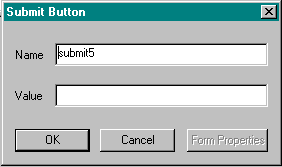
The Submit Button box is displayed.
- The Submit Button box has the following options:
- Name:
Specify a unique name for this submit button. This name is used in the CGI program to refer to this element. Web Factory provides a unique name that you or the CGI programmer can change. - Value:
Type the text that will appear on the button, usually "Submit".
- Name:
- Click OK.
The submit button is displayed in the form.
| Example: |
Inserts a reset button into the current form. Reset buttons clear the text and/or selections the user has entered, and allow the user to start all over in filling out the form.
-
Click on the Reset button
 on the Forms Toolbar.
Or, access the Insert menu and select Reset Button from the Forms sub menu.
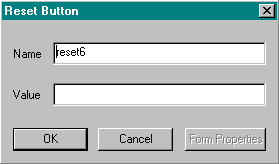
The Reset Button box is displayed.
- The Reset Button box has the following options:
- Name:
Specify a unique name for this reset button. This name is used in the CGI program to refer to this element. Web Factory provides a unique name that you or the CGI programmer can change. - Value:
Type the text that will appear on the button, usually "Reset". - Click OK.
The reset button is displayed in the form.Example:
- Name:
| Return to Table of Contents | Return to Create Forms |
This Web page created in Web Factory.